Working with leather is a timeless craft that invites creativity, patience, and a keen sense of texture. Whether you’re a seasoned artisan or a curious beginner, the world of leather goods manufacturing offers endless possibilities to turn raw hide into functional and decorative objects. From wallets and belts to bags and keychains, each project is a chance to practice fundamental techniques, experiment with design, and develop a personal style that reflects the tactile nature of the material.
Choosing the Right Leather
Before you begin, it’s essential to understand the different types of leather available and how each responds to tooling, stitching, and finishing. Common options include vegetable‑tanned calfskin, suede, goatskin, and bonded leather. Vegetable‑tanned hides are favored for their natural look, durability, and ability to hold a rich patina over time. Suede, on the other hand, offers a softer feel but requires special care to maintain its nubuck surface.
When selecting a piece, look for even grain, minimal blemishes, and consistent thickness. A slightly heavier hide will hold seams better, while a thinner sheet is more pliable for intricate cuts. Many makers prefer a thickness of 0.8–1.0 mm for wallets and keychains, whereas larger items like bags may benefit from 1.5–2.0 mm stock.
Essential Tools for Leather Work
While a simple set of scissors and a cutting mat can get you started, a few core tools will streamline the process and improve the quality of your finished goods.
- Cutting tools: A rotary cutter or a sharp hobby knife provides clean, straight edges.
- Rulers and templates: A flexible ruler or a dedicated leather ruler helps maintain consistent measurements.
- Stitching tools: A needle holder, stitching chisel, and a good pair of leather needles are crucial for neat hand stitching.
- Edge finishing: Burnishing combs and edging tools smooth raw edges and enhance the overall look.
- Finishing supplies: Leather dyes, oils, and waxes allow you to customize color and protect the surface.
Basic Techniques in Leather Goods Manufacturing
Mastering a handful of foundational skills is key to progressing toward more complex projects. Below are the primary steps most leather artisans follow when turning a raw hide into a usable product.
- Cutting: Measure and mark your leather with a pen or pencil, then cut along the line using a rotary cutter. Keep the blade perpendicular to the leather to avoid uneven edges.
- Marking: Use a leather marking pen to outline stitching lines, seam allowances, and edge positions.
- Stitching: Hand‑stitching with saddle stitches or blanket stitches adds strength. Thread the needle with strong thread or nylon cord, and count stitches to maintain even spacing.
- Edge treatment: Burnish edges with a burnisher or edge roller to reduce fraying and create a polished look. For a more decorative finish, consider using a colored or pearl edge.
- Finishing: Apply leather conditioner, oil, or wax to protect the surface, enhance color, and provide a subtle sheen. Let the product cure before use.
Creative Project Ideas for Beginners
Starting with smaller, manageable projects helps build confidence and skill. Below are a few ideas that require minimal tools and materials while still offering room for creative expression.
- Leather Keychains: Cut simple shapes—circles, squares, or personalized initials—and stitch a loop. Add a metal or wooden pendant for flair.
- Wallets: Construct a basic bifold wallet with a single pocket. Experiment with different stitching patterns and color combinations.
- Belt Buckles: Carve a simple buckles shape from a piece of leather and attach a belt strap. Customize the buckles with embossing or carving.
- Coin Pouches: Shape a small pouch from a single panel, stitch a zipper or snap closure, and add decorative stitching or embossing for a personal touch.
- Personalized Book Covers: Wrap a book in leather, add stitching and a metal clasp. This project blends functionality with a touch of elegance.
Intermediate Projects and Skill Expansion
Once you’ve become comfortable with basic techniques, you can tackle larger items and more intricate details. These projects challenge you to integrate multiple steps, refine your cutting precision, and explore advanced stitching patterns.
- Cross‑Body Bags: Create a sturdy base with a rectangular or oblong shape, add a lining, and stitch pockets or compartments. Experiment with different closure types—magnetic snaps, hook‑and‑loop, or button‑down.
- Leather Luggage Tags: Use a thick leather to craft tags that can be personalized with monograms. Add a metal plate or engraved emblem for a professional look.
- Backpacks: Design a simple backpack with two main compartments and a front pocket. Incorporate a shoulder strap and reinforce stress points with additional stitching or patching.
- Custom Belts: Produce a belt with an adjustable buckle, a leather strap, and optional embellishments like metal studs or decorative stitching.
- Leather Jewelry: Create bracelets or necklaces by cutting and stitching thin leather strips, adding beads or metal accents for visual interest.
Finishing Techniques that Elevate Your Products
Finishing is often the deciding factor between a functional item and a polished, professional piece. Consider the following methods to enhance durability, color, and texture.
- Burnishing: Using a burnisher to smooth raw edges not only prevents fraying but also creates a subtle shine. A well‑burnished edge gives a high‑quality appearance.
- Coloring: Apply a water‑based leather dye or pigment. Test on a small sample to ensure color consistency. Layers can be blended for unique gradients.
- Coating: After dyeing, apply a clear coat or matte finish to protect the leather from water and wear. Choose a finish that matches the desired sheen.
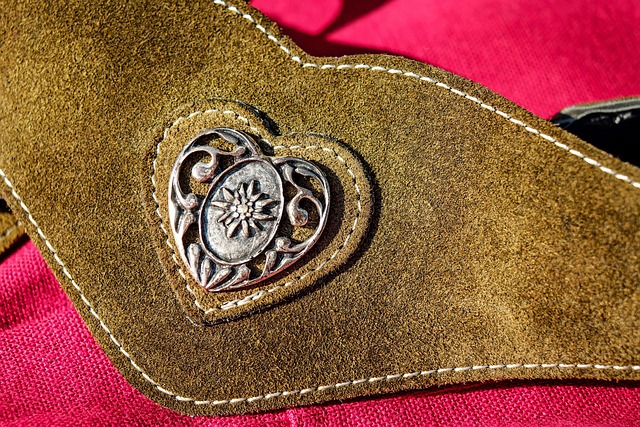
- Embossing: Use a die or hand‑carving tools to imprint patterns or logos onto the leather surface, adding a tactile dimension.
- Stitching Threads: Select contrasting thread colors for visual accent or use metallic thread for a subtle sparkle.
Advanced Techniques for Experienced Makers
For those ready to push the boundaries of leather goods manufacturing, advanced methods provide opportunities to create truly unique and complex items.
- Layered Leather Construction: Assemble multiple layers of leather with different grain orientations. This technique creates depth and visual interest, especially for larger bags or wallets.
- Leather Sewing Machines: Use a leather sewing machine to achieve consistent stitch spacing and high durability. Machines can handle heavy‑duty leather and complex seam patterns.
- Full‑Grain Finishes: Preserve the natural grain of the leather by using minimal tooling and conditioning. Full‑grain leather develops a rich patina over time.
- Custom Tools: Design and build your own cutting blocks, stitching chisel sets, or embossing dies tailored to your projects.
- Mixing Materials: Combine leather with other natural or synthetic materials—wood, metal, or canvas—to create hybrid pieces that showcase multi‑material craftsmanship.
Eco‑Friendly Practices in Leather Goods Manufacturing
Sustainability is increasingly important in today’s craft community. Below are ways to make your leather projects greener without compromising quality.
- Responsible Sourcing: Choose leather that comes from certified, humane farms or from suppliers that practice regenerative agriculture.
- Vegetable‑Tanned Alternatives: Opt for vegetable‑tanned leather instead of chrome‑tanned, as it contains fewer chemicals and is more biodegradable.
- Upcycling: Repurpose old leather goods into new items, such as converting an old wallet into a keychain or a frayed leather patch into a decorative accent.
- Natural Finishes: Use plant‑based oils, beeswax, or soy‑based waxes for conditioning and protection, avoiding synthetic chemicals.
- Waste Reduction: Plan patterns efficiently to minimize scrap, and use cut‑off pieces for accessories like buttons or small pouches.
Building a Personal Portfolio and Sharing Your Work
As you progress, documenting your projects and showcasing them can open doors to commissions, collaborations, or a small business venture. Keep a detailed journal of materials, techniques, and lessons learned for each piece. While images are not included here, consider photographing finished items in natural light to capture their texture and craftsmanship. Networking with other leather crafters—online forums, local guilds, or craft fairs—can provide feedback and inspiration.
Final Thoughts
Leather goods manufacturing is a rewarding practice that blends art, skill, and a touch of patience. Starting with simple projects, gradually incorporating advanced techniques, and always maintaining a mindful approach to sustainability will help you develop a body of work that is both functional and expressive. Every cut, stitch, and finish becomes a part of your personal narrative, reflecting the time, care, and creativity you invest in each piece. Happy crafting!