When the sun slips behind the city skyline and the hum of the street fades into a gentle hush, there is an undeniable urge to turn the quiet moments of home into a canvas of possibility. Fine arts is not confined to galleries and museums; it can be lived, breathed, and crafted within the very walls of your own living space. By tapping into the timeless joy of making, you can transform ordinary materials into extraordinary expressions of personality, history, and imagination. Below is a curated collection of hand‑crafted projects that invite you to experiment, learn, and ultimately create art that feels deeply personal and uniquely yours.
Why Handcraft Matters in a Digital Age
In an era saturated with instant gratification and digital abundance, the tactile experience of creating something with your own hands stands out as a powerful antidote. Handcraft offers a sense of intentionality: each decision, from the first stroke of paint to the final trim, becomes a conscious act. This deliberate process encourages mindfulness, reduces stress, and fosters a deeper connection between creator and creation. When you hand‑craft a piece of furniture, a decorative item, or even a simple wall hanging, you embed a narrative that can be passed down through generations, turning a fleeting aesthetic into a lasting legacy.
- Enhanced focus and concentration during the creation process.
- Opportunity to repurpose and recycle everyday items.
- Strengthened hand‑eye coordination and fine motor skills.
Choosing the Right Materials for Your Fine Arts Projects
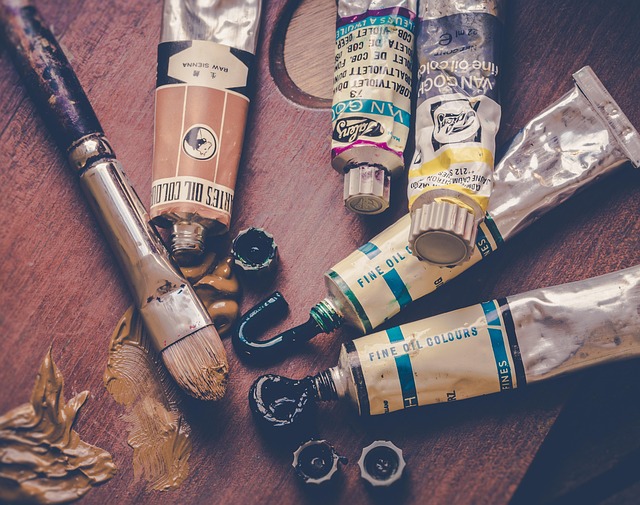
Material selection is foundational to the success of any hand‑crafted endeavor. While the world of fine arts often revolves around traditional supplies—oil paints, canvases, and marble—DIY projects can be just as rewarding when you incorporate unconventional or reclaimed materials. Here are a few categories to consider:
“A well‑chosen material is the first brushstroke in a painting.” — Anonymous
- Wood: From reclaimed pallets to exotic hardwoods, wood offers warmth and versatility. Experiment with staining, carving, or turning to create custom furniture or decorative panels.
- Paper and Fabric: Origami, tapestry, and quilting all allow for color experimentation and texture layering. These materials can be sourced sustainably or upcycled from old clothing.
- Metals and Glass: Welding, annealing, or simple metal stamping introduces a structural element that can serve both functional and decorative roles.
Project 1: Rustic Gallery Wall with Reclaimed Wood
This project is perfect for those who want a dramatic visual statement without breaking the bank. Reclaimed wood offers an organic grain that adds depth and character to any room. By combining it with simple frames or painted panels, you create a cohesive display that highlights your favorite photos or artwork.
- Gather a set of reclaimed boards—size and color should vary to create visual interest.
- Sand each board to smooth edges and remove splinters.
- Apply a clear varnish or a light stain to preserve the natural look.
- Arrange the boards on the wall, experimenting with different configurations—grid, asymmetrical, or overlapping—until the layout feels balanced.
- Incorporate picture frames or clipboards to add personal touches and easily update the display.
Not only does this project add warmth to the room, but it also recycles wood that would otherwise go to waste, turning environmental responsibility into artistic expression.
Project 2: Hand‑Painted Masonry Candleholders
Candleholders are a classic element of home décor, but the simple act of painting them adds a layer of uniqueness. Use ceramic or stone tiles, and let your imagination dictate the theme—floral, abstract, or even a personalized family crest. This project is forgiving, making it ideal for beginners and seasoned artists alike.
- Collect a set of unglazed ceramic tiles.
- Sketch a design lightly with a pencil—consider repeating motifs for a cohesive look.
- Use porcelain paint and fine brushes to execute the design.
- Seal with a glaze for durability and shine.
- Place a votive candle inside, and enjoy a subtle glow that showcases your hand‑crafted style.
Project 3: Textile Quilt with Mixed Fabrics
Quilting allows you to blend texture, color, and memory. By using fabrics that carry sentimental value—like old scarves, shirts, or even napkins—you transform past experiences into a tactile heirloom. This process is deeply rooted in the tradition of fine arts, as it merges functional design with artistic narrative.
- Sort fabrics by color palette and pattern type.
- Create individual blocks—each block could represent a year, a family member, or a thematic element.
- Assemble the blocks into a quilt top, securing with a seam allowance.
- Layer a batting and backing fabric, then quilt through all layers.
- Finish with a binding—hand‑stitched or machine—adding a polished edge.
Beyond its visual appeal, the quilt invites you to pause, reminisce, and appreciate the layered complexity of home life.
Project 4: Mixed Media Sculptural Lamp Shade
Bringing sculpture into the realm of functional art is both challenging and rewarding. A lamp shade that incorporates mixed media—such as wire, paper mache, or recycled plastic—turns a simple light fixture into a focal point. The interplay of shadows and textures invites curiosity and conversation.
- Begin with a base lamp shade—either a new or an old one you wish to refurbish.
- Attach a framework of thin aluminum or copper wire to define the desired shape.
- Apply paper mache or a pliable polymer over the wire for sculptural form.
- Once dry, paint or seal the surface with a glossy or matte finish.
- Replace the bulb and enjoy the ambiance created by your artistic vision.
Project 5: Hand‑Stenciled Accent Wall
Walls are the invisible canvases of a home. By stenciling a design—be it geometric patterns, botanical prints, or abstract shapes—you can instantly transform a space without the need for expensive wallpaper or paint jobs. The key to success lies in preparation and patience.
- Choose a wall area that is smooth and well‑prepared.
- Select a stencil that fits your aesthetic; freehand options are also available for the more adventurous.
- Prime the wall to ensure paint adhesion.
- Apply a base coat of paint—this will act as the background color.
- Position the stencil and apply paint using a sponge or roller, ensuring even coverage.
- Remove the stencil carefully before the paint dries.
- Apply a second layer if desired for depth.
With the right combination of colors and patterns, this project can become a signature statement in any room.
Project 6: Upcycled Glassware Mosaic Coasters
Glass shards, bottle caps, and broken glassware are often discarded, yet they hold potential as decorative mosaics. These coasters are practical, eye‑catching, and carry an environmental message. The process involves cutting, arranging, and securing the glass fragments into a cohesive piece.
- Gather small pieces of broken glass—ensure safety by wearing gloves.
- Use a fine saw or specialized glass cutter to shape fragments if necessary.
- Arrange the pieces on a backing board—preferably cork or wood—to create an image or abstract design.
- Adhere each fragment with a strong, clear adhesive; let it cure fully.
- Apply a sealant to protect the glass and add shine.
These coasters become conversation starters, reminding guests of the beauty that can arise from mindful reuse.
Project 7: Hand‑Poured Candles with Natural Fragrances
While candle-making is often perceived as a straightforward task, infusing it with natural scents and artistic container designs elevates the product to fine art status. The process combines chemistry, sensory design, and aesthetic judgment.
- Choose a wax type—soy, beeswax, or tallow—and melt it using a double boiler.
- Add essential oils or botanical extracts for fragrance, adjusting concentrations to achieve the desired intensity.
- Stir to ensure uniform distribution of scent.
- Pour the liquid wax into chosen containers—ceramic mugs, glass jars, or even carved wooden molds.
- Insert a wick, ensuring it remains centered.
- Allow the wax to set, then trim the wick and cure the candle for a few days.
By selecting eco‑friendly containers and customizing scents, you produce candles that not only illuminate but also evoke memories and moods.
Project 8: Hand‑Crafted Jewelry Box with Embossed Design
Combining woodcraft with fine metalwork yields a piece that serves both functional and artistic purposes. An embossed design—whether it’s an intricate leaf pattern or a family monogram—adds tactile intrigue and depth.
- Select a hardwood such as walnut or cherry for the box frame.
- Design a pattern on paper, then transfer it to a flexible embossing tool.
- Press the tool onto the wood surface, applying gentle pressure for a subtle relief.
- Finish with a coat of natural oil or varnish to protect the wood and highlight the embossed detail.
- Add a lining of velvet or satin inside to safeguard jewelry.
Such a box becomes an heirloom, reflecting both the maker’s skill and the homeowner’s taste.
Project 9: Sculptural Plant Stand from Reclaimed Metal
Indoor plants have become a staple in contemporary décor, and the stand they rest upon can make a statement. Using reclaimed metal, such as old railings or pipe fittings, you can create a sculptural plant stand that merges rustic charm with industrial aesthetics.
- Collect metal pieces that are clean and corrosion‑free.
- Plan the stand’s design—think of shapes like spirals, arches, or geometric forms.
- Use a welding torch or metal bonding technique to assemble the structure.
- Smooth all edges with a grinder and sandpaper to avoid sharp points.
- Apply a weatherproof coating to prevent rust and extend durability.
When a plant is perched atop this stand, the combination of organic foliage and metallic form creates a harmonious dialogue between natural and engineered beauty.
Project 10: DIY Wall Clock with Reclaimed Wood and Vintage Glass
Timepieces are not only functional but also symbolic. By marrying reclaimed wood with vintage glass, you create a wall clock that carries both history and personality. The construction process encourages precision, patience, and creativity.
- Choose a circular piece of reclaimed wood for the face.
- Use a lathe to carve out the center and ensure the wood is even.
- Attach a vintage glass piece—such as a broken antique windowpane—at the top of the face.
- Install a standard wall‑clock mechanism, including hands.
- Decorate the perimeter with hand‑drawn numerals or painted motifs.
- Secure the clock to the wall with a sturdy mount.
This clock becomes a conversation piece, reminding those who see it of the passage of time and the stories each reclaimed material holds.
Conclusion: Embedding Fine Arts into Everyday Life
In the rush of modern living, the act of making can be both grounding and transformative. Each project outlined here offers a pathway to infuse everyday spaces with the richness of fine arts, while remaining accessible to those of all skill levels. By selecting materials thoughtfully, respecting traditional techniques, and allowing your imagination to guide you, you can create handcrafted items that resonate personally and aesthetically.
Whether you’re painting a wall, weaving a quilt, or assembling a metal stand, remember that the true value lies not in the finished product alone but in the process itself—how it shapes your creativity, strengthens your connection to your home, and enriches your life. Let the spirit of fine arts flourish within the walls you inhabit, and may your handcrafted projects become a testament to the beauty that can arise from mindful, hands‑on artistry.