When holiday seasons arrive, the urge to create unique, hand‑made decorations often rises. Instead of buying ready‑made ornaments or décor, many people turn to the versatile world of acrylic painting. Acrylics dry quickly, blend beautifully, and can be applied to a wide array of surfaces, from plain wood to glass and even fabric. Whether you’re a seasoned artist or a complete beginner, exploring acrylic painting for festive projects opens a world of possibilities, allowing you to design personalized gifts, table centerpieces, or wall art that captures the spirit of the season.
Gathering Your Supplies: The Foundation of Success
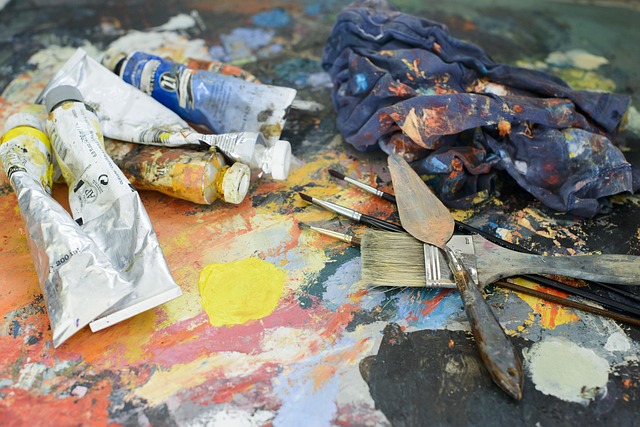
Before you dive into a festive project, it’s essential to assemble the right toolkit. Acrylic painting doesn’t require an enormous set of materials; the core items that will cover most creative needs are listed below. Having them on hand not only saves time but also prevents interruptions when the inspiration hits.
- High‑quality acrylic paints in primary colors plus black, white, and metallic shades.
- Assorted brushes: flat, round, filbert, and a small angled brush for detail work.
- Palette or mixing tray for blending hues.
- Canvas, paper, wood panels, or pre‑treated fabric depending on the project.
- Acrylic medium or gel medium for adjusting texture and drying time.
- Masking tape, painter’s paper, and a drop cloth to protect surfaces.
- Protective gloves, a well‑ventilated space, and a small bucket of water for rinsing brushes.
Mastering Basic Techniques: From Swirls to Splatter
Because acrylic paints dry fast, mastering timing and blending is crucial. Below are simple techniques that can elevate any festive design.
- Gradient Wash: Start with a wet brush and apply a thin layer of a single color. While still wet, dip the brush into a lighter or darker shade to create a smooth transition. This technique works wonderfully for snow‑flake backgrounds or watercolor‑style ornaments.
- Dry Brush: Load a brush with paint, then dab it onto a dry surface to reveal texture. Use this for adding subtle highlights on carved wood or for creating a “frosted” effect on glass decorations.
- Splatter Effect: Shake a small amount of paint into a cup, then flick it onto a surface with a flick of the wrist. This spontaneous technique is ideal for simulating snow or creating an abstract backdrop for a holiday card.
- Glazing: Once a base coat has dried, apply a thin, translucent layer of paint to alter hue or add depth. This works well for giving a shimmering effect to metallic holiday ornaments.
Festive Project Ideas: Where Creativity Meets Craftsmanship
Below are a handful of handcraft projects that combine acrylic painting with seasonal flair. Each idea includes a brief description, recommended materials, and step‑by‑step guidance to help you achieve professional results.
-
Personalized Holiday Ornaments
Use clear glass or acrylic balls as a canvas. Paint intricate designs—like a family name, a snow‑flake pattern, or festive symbols—using fine brushes. For extra sparkle, add a few silver or gold metallic dots. Once the paint dries, seal the ornament with a clear acrylic sealer to protect it from wear and tear.
-
Snow‑Covered Wooden Signs
Select a small wooden sign or pre‑cut shapes (e.g., “Happy Holidays”). Paint a winter landscape or simple snow‑flake motif. After the base coat dries, use a dry brush technique to give the appearance of freshly fallen snow. Finish with a clear gloss coat for durability.
-
Festive Fabric Banner
Choose a lightweight fabric like muslin. Sketch a holiday motif lightly with a pencil, then paint over it using acrylics specifically formulated for fabric. Once dry, iron the banner to set the paint. The result is a vibrant, removable backdrop for parties or photo sessions.
-
Seasonal Mason Jar Lanterns
Paint the exterior of glass jars with acrylics in wintery shades—blues, whites, or muted greens. Add silhouettes of pine trees or reindeers using darker colors. Inside, place a battery‑operated LED light. The painted designs will glow softly, creating a cozy ambiance.
-
Custom Holiday Greeting Cards
Use thick cardstock as a base. Sketch holiday scenes, then apply acrylic layers to build depth. Incorporate metallic inks or glitter for accents. Once the paint has set, fold the cards and add a personal handwritten message on the inside.
Adding Texture and Dimension: Enhancing Visual Appeal
Acrylic paint is a versatile medium for texture. By layering, mixing mediums, and employing certain techniques, you can give your holiday creations a richer, more dynamic feel.
- Gel Medium: Mix gel medium with paint to create a thicker consistency. This is ideal for building raised elements—think 3D snow crystals on a canvas or thick accents on a wooden sign.
- Sand or Crystals: Before the paint dries, sprinkle fine sand or crystals onto wet layers. This technique works beautifully for adding a subtle glitter effect to ornaments or for creating realistic snow on a landscape painting.
- Foam Brush Strokes: Use a foam brush to apply paint in a “stroked” manner. The foam’s natural ridges produce a pattern reminiscent of brush‑stroked winter scenes.
Protecting Your Masterpieces: Sealing and Caring for Acrylic Works
Once your creative efforts are complete, a proper seal will preserve color vibrancy and prevent fading or smudging. The choice of sealer depends on the material of the base.
- For canvas and paper: a matte acrylic varnish maintains a subtle sheen without adding gloss.
- For wood panels: a glossy or satin varnish protects against moisture and enhances color richness.
- For fabric: a clear fabric sealant keeps the paint from cracking or peeling during washing.
Always allow each coat to dry completely before applying the next. Typically, a single coat suffices for most projects, but double layers may be beneficial for highly porous surfaces.
Eco‑Friendly Tips: Sustainable Acrylic Painting
Even while indulging in creative projects, it’s possible to minimize environmental impact. Here are a few eco‑friendly approaches:
- Choose water‑based acrylics with low volatile organic compounds (VOCs).
- Recycle old brushes by cleaning them and repurposing for smaller projects.
- Use natural dyes (like turmeric or beet juice) for subtle color accents in combination with acrylics.
- Avoid plastic pallets; instead, use bamboo or wood for storage.
By integrating these practices, your festive handcrafts not only become personal tokens but also mindful gestures toward sustainability.
Inspiration and Skill Development: Where to Find Ideas and Practice
To keep the creative spark alive, it helps to expose yourself to a range of styles and techniques. While you don’t need to use links, here are several approaches you can consider:
- Attend local workshops that focus on acrylic painting for beginners.
- Read books or print tutorials on seasonal motifs and acrylic techniques.
- Join online forums or communities dedicated to handcrafts, where members often share seasonal projects.
- Practice by recreating famous holiday scenes before experimenting with your own interpretations.
Consistent practice and exploration of different themes will deepen your understanding of acrylics and expand the range of projects you can confidently tackle.
Final Thoughts: The Joy of Handmade Festive Art
Creating handmade festive decorations through acrylic painting is more than a hobby; it’s a celebration of personal expression, a way to share joy, and an avenue for learning new skills. The medium’s flexibility, rapid drying time, and compatibility with diverse surfaces make it especially suited for holiday projects. From shimmering glass ornaments to textured wooden signs, the possibilities are limited only by imagination.
Remember to start with a solid plan, gather the right supplies, master a few foundational techniques, and allow each piece to dry and seal properly. With practice and patience, your acrylic holiday creations will become cherished keepsakes that bring warmth and color to any season.