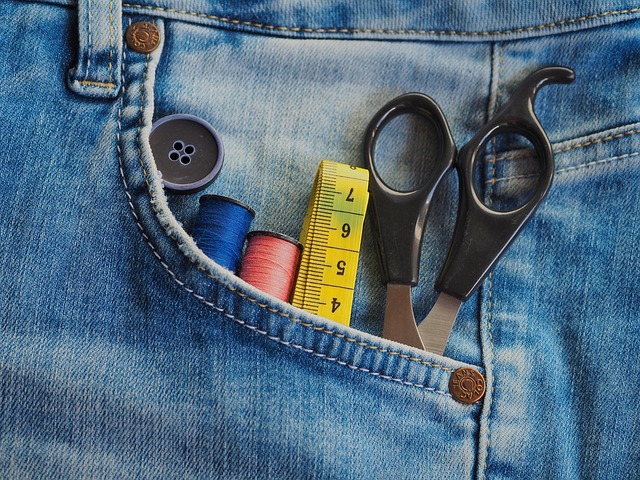
When a handcraft enthusiast sits down to a new project, the first thing that often surfaces in their mind is a measuring tape. The humble stretchable ribbon that shows inches and centimeters can transform a raw idea into a precise creation. It’s more than a tool; it’s a bridge between imagination and craftsmanship. In this guide, we’ll explore how the measuring tape can be the catalyst for a variety of DIY projects that celebrate precision, creativity, and the joy of making.
Why the Measuring Tape is a Crafting Cornerstone
Every handcraft, whether it’s quilting, woodworking, or jewelry making, relies on accurate measurements to achieve a harmonious final product. The measuring tape provides the following advantages:
- Flexibility: It can contour around uneven surfaces, which is essential for projects like wrapping a curved table or creating a custom-fit cushion.
- Speed: A quick glance at the tape reveals the needed dimensions, cutting down on time spent with rulers and calipers.
- Consistency: Reusing the same tape across multiple projects ensures uniformity in scale, which is particularly useful for batch crafting or repeating a pattern.
Project 1: Custom Fabric Scarf with Geometric Patterns
Scarf making is a timeless craft that allows beginners and seasoned crafters alike to experiment with color and shape. By leveraging the measuring tape, you can design a scarf that fits perfectly and showcases unique geometric motifs.
- Choose your fabric: Lightweight cotton or silk works best for a clean drape.
- Measure the length: Decide on the desired scarf length—most fall between 50 and 60 inches for a standard size. Mark this on the fabric using a lightweight thread.
- Mark the width: Common widths range from 6 to 10 inches. Use the measuring tape to create a grid of equal squares across the fabric, each square measuring 2 inches. These squares become the building blocks of your geometric pattern.
- Create the pattern: Invert colors, add borders, or introduce a repeating motif within each square. The measuring tape’s consistent measurements ensure that each element aligns perfectly.
- Cut and stitch: Trim to the marked length and sew the edges with a tight zigzag stitch to prevent fraying. Your custom geometric scarf is now ready to wear or gift.
Project 2: Handcrafted Leather Keychains with Intricate Cuts
Leather keychains are small but impactful items. Using a measuring tape, you can produce keychains with precise shapes and uniform thickness, giving your creations a professional look.
- Measure and cut leather: Decide on the size—commonly 2.5 inches by 1 inch. Mark these dimensions on the leather with a pencil or sharp blade, using the measuring tape for exactness.
- Create a template: Before cutting, sketch your desired shape (circle, star, custom logo) onto paper. Use the measuring tape to maintain equal distances between the curves or angles.
- Transfer to leather: Place the template over the cut leather and trace around it, keeping the measuring tape handy to double‑check that the lines match the original dimensions.
- Cut the final shape: Using a leather knife, cut along the traced lines. Keep the measuring tape nearby to verify that the cuts are symmetrical.
- Add hardware: Punch a hole near one edge with a keyhole punch, then attach a keyring. The measuring tape ensures the hole is positioned consistently across multiple keychains.
Tips for Achieving Consistent Leather Cuts
“The measuring tape is your silent partner in leather crafting—keep it close, and your pieces will align like stars in a well‑ordered constellation.” — Anonymous Craftmaster
Use a ruler to guide the knife for straight cuts, and a straight edge for curved cuts. Always double‑check distances with the measuring tape before finalizing the cut.
Project 3: DIY Quilted Blanket with Modular Squares
Quilting is a craft that embraces both tradition and innovation. By employing a measuring tape, you can design a quilt that is perfectly proportioned and visually balanced.
- Decide on square size: Common quilting squares are 8 inches by 8 inches. Mark these on your fabric pieces using the measuring tape.
- Cut the squares: Use a rotary cutter and a cutting mat for clean edges.
- Arrange the layout: Lay out the squares in a grid, verifying that the spacing between them remains consistent by measuring with the tape.
- Sew the squares together: Use a ¼ inch seam allowance, and keep the measuring tape handy to ensure each seam aligns properly.
- Layer and sew the top, middle, and bottom layers: Measure the dimensions of each layer to ensure they match, preventing a lopsided quilt.
- Finish the edges: Roll the raw edges into the underside and stitch along the edge, using the measuring tape to maintain a uniform border width.
Why Consistency Matters in Quilting
Even a minor discrepancy in square size can ripple through the entire quilt, causing seams to misalign and the pattern to appear distorted. A measuring tape keeps each piece on track, resulting in a quilt that feels cohesive and polished.
Project 4: Personalized Home Décor – Metal Photo Frames
Creating custom photo frames from metal sheets is an excellent way to merge functionality with artistic flair. A measuring tape ensures that each frame is cut to exact dimensions and that the frame’s joints fit snugly.
- Choose frame size: Decide on the photo size—standard frames are 4×6 inches, but you might opt for larger dimensions like 8×10 inches.
- Mark the metal sheet: Use a permanent marker to draw the frame outline. Measure each side with the measuring tape to ensure equal lengths.
- Cut the metal: Employ a metal saw or an angle grinder, following the marked lines precisely.
- Smooth edges: Use a file or a bench grinder to remove sharp edges.
- Assemble the frame: Drill holes at the corners, then use screws or rivets to join the edges. Verify that the angle between each joint is right by measuring with the tape.
- Add finishing touches: Polish the metal, apply a protective coating, and insert a photo or artwork.
Key Safety Note
Always wear eye protection when cutting or filing metal. Keep the measuring tape out of the way while cutting, and then re‑measure the finished edges to ensure they meet the original specifications.
Project 5: Hand‑Made Candles with Layered Design
Candle making is a tactile, fragrant hobby that benefits from precise measurements. By using a measuring tape, you can create layered candles that are visually stunning and perfectly balanced.
- Determine candle height: Standard candles are around 4 inches tall. Measure your wax containers to achieve this height, using the measuring tape for accuracy.
- Prepare the wax: Melt wax in a double boiler. Divide the melted wax into batches of equal size—measure each batch with the measuring tape before pouring.
- Layer the colors: After pouring the first layer, allow it to set partially before pouring the next color. Use the measuring tape to ensure each layer is about 0.5 inch thick.
- Set the wick: Position the wick at the center of each layer using a wick holder, and verify its alignment with the measuring tape.
- Finish the candle: Once all layers are poured and cooled, trim the wick to ¼ inch above the wax surface. Measure the overall height again to confirm it matches your target.
Why Layer Thickness Matters
Uneven layer thickness can cause a candle to burn unevenly or topple. By measuring each layer with a tape, you guarantee consistent burn performance and aesthetic appeal.
Beyond the Projects: Building a Measuring Tape Toolbox
While a standard measuring tape can handle most DIY tasks, certain projects benefit from specialized tools. Consider adding these items to your crafting kit:
- Steel Ruler: For sharp, straight cuts on cardboard and wood.
- Flexible Curve Ruler: Ideal for drafting curves and working with fabrics that require gentle bends.
- Laser Level: Useful for aligning long, flat surfaces, such as when constructing shelving.
- Digital Calipers: Provide precise measurements in fractions of an inch, perfect for fine jewelry or micro‑engraving.
By combining a versatile measuring tape with these complementary tools, you can approach any project with confidence.
Conclusion: The Measuring Tape as a Creative Ally
From quilts to keychains, the measuring tape is a silent partner in the world of handcraft. It brings precision, consistency, and a sense of order to projects that could otherwise drift into chaos. By mastering the use of this simple tool, you open the door to endless possibilities—each new creation a testament to your skill and imagination.
So the next time you set out to make something special, reach for the measuring tape first. Let it guide your hand, shape your vision, and transform your ideas into tangible wonders.